Monday 28 September 2015

Coffee Filter Trees


I had to share these incredibly easy fall trees that my Grade One class made!

Students used eyedroppers to drip liquid water color paints onto coffee filters.  Don't be stingy with the paint as they will be brighter. You could also use washable markers to colour the filters and then spray with water.  But again, make sure they fill the filter with lots of colour!

 When dry, they cut out this fabulous tree template.  The template for the tree is from a book that does not allow me to share it here due to copyright limitations.  However, you could easily use something a lot less complicated as it was a challenge for a few of them.  However, you could hear a pin drop during cutting time due to the extreme need for concentration!!

Here is a free online template you could use for the tree.

These look so great in my window and it makes me smile every time I walk
 into my room and see them!

Wednesday 29 April 2015

Vancouver Cityscapes


My Grade One class created these beautiful cityscape collages of Vancouver, BC.  We were inspired by a local artist named Nicholas Brancati.  He is an illustrator who creates mixed-media collage illustrations and art using bits and pieces of fabric, paper, packaging, magazine, newspaper, cardboard and various other materials.  You cans find more of his amazing work on his Etsy Shop page.

I used one of the prints I purchased from him at the Vancouver Make It Market last year for our inspiration.  My students all immediately recognized our famous Vancouver landmark, Science World, and were eager to create their own versions. Unfortunately I no longer see this particular print on his website.  But here are a few close-ups of what we were able to create.:


Our evening art contains buildings created in cool colored construction paper.  However, this would be just as effective in bright primary and secondary colors as well. 


Wednesday 8 April 2015

Spring!

 Here is a lesson inspired by The Tiny Seed by Eric Carle.


After reading the book we decided to use the same painted papers we had left over from our Winter Birds buddy activity.  Once again we got together with our Big Buddies for a little extra help.


Using petal tracers that they had made for us, we cut out approximately 10 petals and arranged them in a circle around a yellow tissue paper circle.  Green tissue was used to create a stem and leaves.  We then used whatever scraps of painted paper and tissue we had to create an insect.


Wednesday 1 April 2015

Mouse Paint Colour Wheels


I found this adorable colour wheel idea on Artsonia.com.  After reading the book Mouse Paint by Ellen Stoll Walsh we created our own versions.  We folded a sheet of paper into 6 squares - they do not have to be perfect squares!  We then painted each primary colour onto a square and then use our primary colours to mix our secondary colours and painted those on the remaining 3 squares.


The next day we used tracers on the back side of the painted papers to draw out our 6 mouse shapes.  We then glued them in a circle to replicate a colour wheel - all primary colours lie opposite their complimentary secondary colour.


We cut ears out of pink construction paper and used sharpies to add tails and eyes.


This student didn't follow the directions completely but I love how all the other mice look like they are fleeing the green one!  Pretty darn cute!


Tuesday 3 February 2015

Mondrian Hearts


This art activity was inspired by Mrs. T's First Grade Class
  Our version was done a bit differently.  We drew lines on heart templates with pencils and rulers and then painted in our shapes.  When the paint was dry we cut out our hearts and glued them onto black construction paper.  We then glued down black strips of paper to cover our pencil lines and then cut our the hearts again leaving a black border.


This bulletin board display might be my favorite of all time.  Here is what my board looked like before the art work was put up:

Sunday 1 February 2015

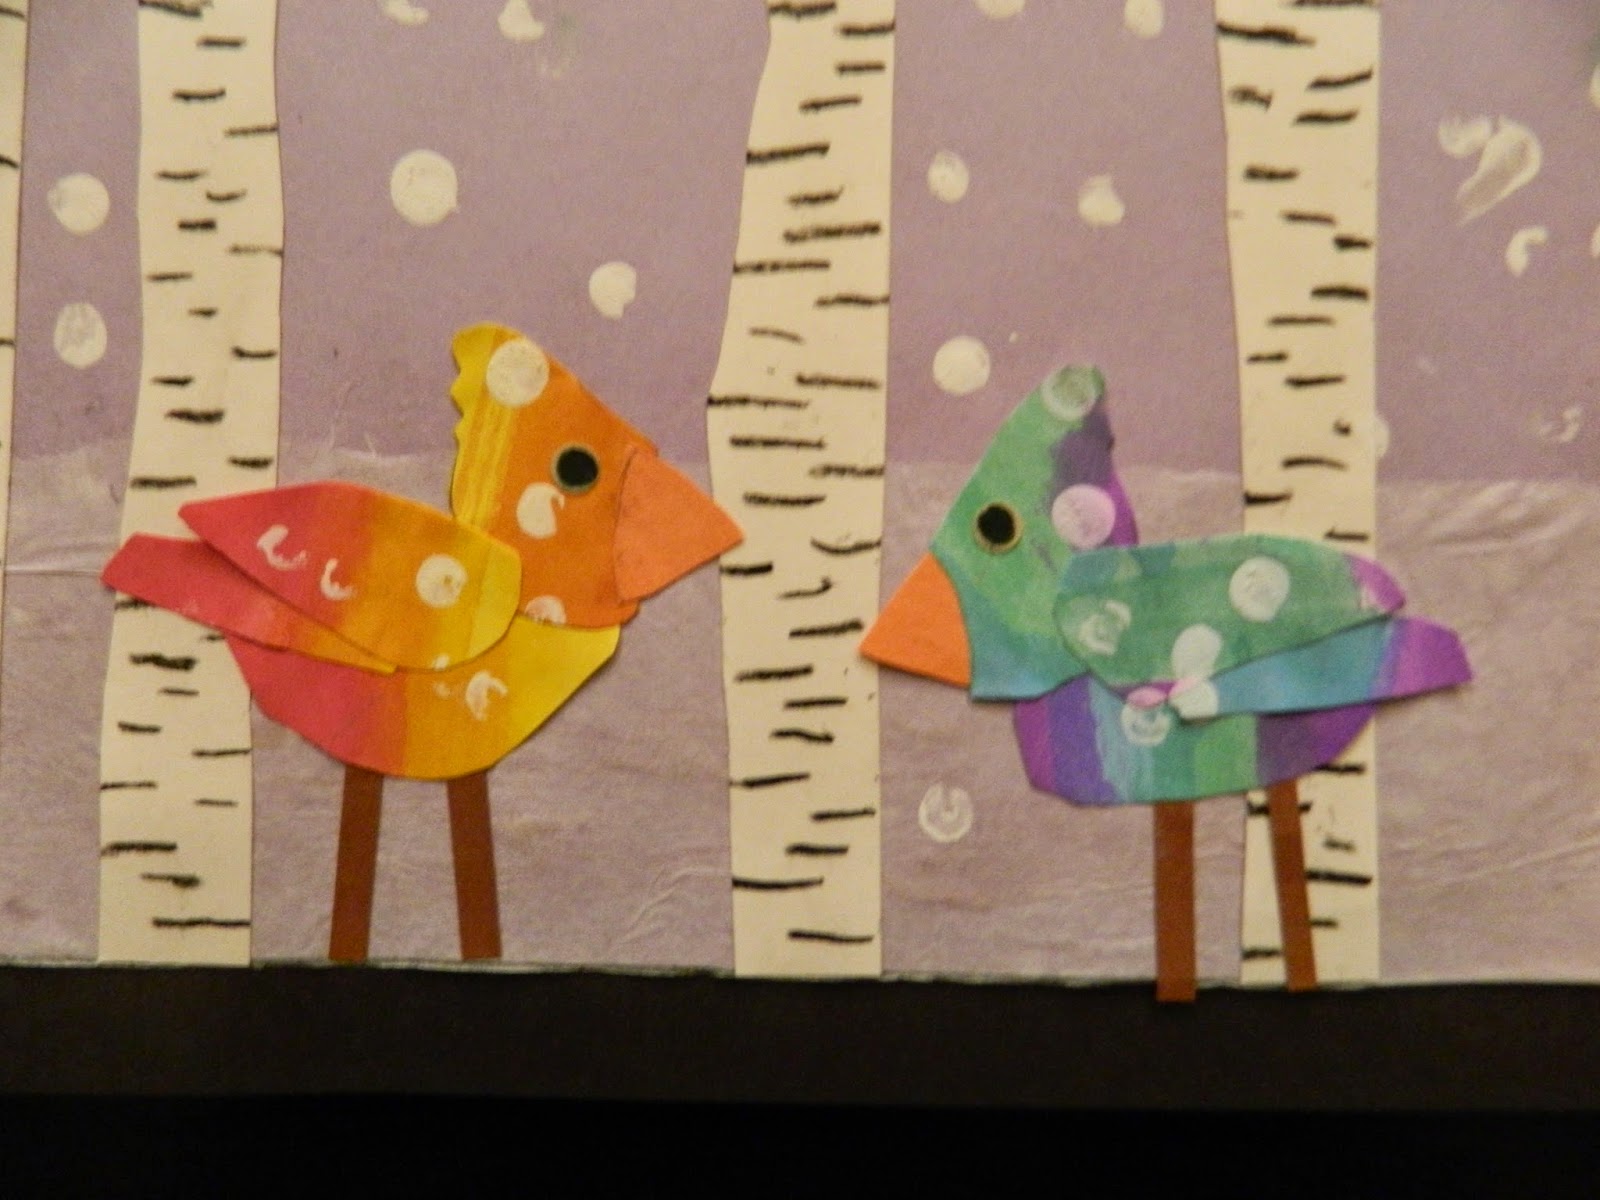
Winter Birds


Here is an adorable winter collage activity my Grade Ones did with the help of our Big Buddy class.  You can find all the instructions, including printable templates, at


I HEART CRAFTY THINGS provides two versions for templates to create the birds.  One has the birds in one piece (other than the beak) and the other has them in multiple pieces.  We used the multiple pieces version here.  Putting all the bird pieces together would have been way too difficult for my little ones with the help of their Big Buddies.  If you try this with a younger class I would highly recommend using the simpler template.


Thursday 8 January 2015

December Art

I know the holidays are over but I just wanted to share some of the wonderful art and crafts that my class did during the month of December.


 Love these salt dough ornaments!  So adorable and easy.  Find the original post here.  We added white iridescent sparkles to ours.  I will definitely do these again!


  Here is my version of the singing reindeer.  Think I would forgo the pipe cleaner antlers for a paper version next time - some of them have sort of an insects vibe :)


We made these paper strip Christmas trees.  Find the original post here.


And last but not least, we made these incredible elves with the help of Rob and his video at Art for Kids Hub.


I hope you all had a wonderful holiday!
Wishing you all the best for 2015!!!

LinkWithin

You May Also Like

Followers