Saturday 30 March 2013

Happy Easter!


I happen to come across this photo while scrolling through pictures on my phone.  I actually made this pine cone craft 2 years ago with my grade one class.  They were fairly easy.  We first painted the pine cones either white or yellow.  When dry they were stuffed with cotton.  Then using paper scraps the students made eyes, beaks and feet.

Sunday 17 March 2013

Family Clay Tiles


This post actually features 2 ideas I got from Pinterest. 
The first is a clay project I did with my class to go with out Family Unit.  After learning how to attach pieces of clay together, they had to cut our their tile and attach at least one heart (made with cookie cutters).  The idea I got from Pinterest was using pasta letters to make letter impressions.  The idea is that you press the letters in and they will burn off during the first firing in the kiln.  Students used the letters to spell out all members of their immediate family and some decided to include their last names as well.  I have smudged out some of the names for privacy concerns.

WARNING:  What the pins don't tell you is how much it stinks when the pasta is burning away!!!
Luckily for me our school kiln is not in my classroom but now I have to figure out a way to make it up to the grade 7 teacher for putting up with the temporary stench! 


This was the first time trying this technique so I let the kids choose if they wanted to try to keep the letters unglazed or use their brushes to get the glaze right in.  Now I see that I would prefer covering everything with the glaze because the colour is more consistent and it is much easier to read the names.


The second idea has you adding powdered jello or powdered juice to paint to make your art actually smell like the jello/juice.  You can see the original post here.

Our school is starting an amazing program after Spring Break called Project Chef.  As a school we wanted to kick off the program by creating food art for our hallway bulletin boards.  I thought this would be a good opportunity to try it out. 

I changed to activity a little.  We used pastels to outline the strawberry shape and colour in the stems.  We also used pastels to colour in the seeds, instead of gluing on buttons.


It did actually work.  People would come into the classroom and say how nice it smelled.  But after awhile I couldn't smell it at all. I guess I got used to the scent.  I believe the scent didn't last too long though, but if you put the paper up to your face you could definitely smell it.  The kids loved holding their art up to their noses and enjoying the sweet smell!!

Monday 4 March 2013

Lucky Leprechauns - Plasticine Art


Now that it's March I wanted to do a St. Patrick's Day themed activity. 
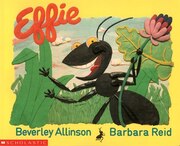
Normally around this time of year I do a little mini unit on illustrator Barbara Reid, whose amazing illustrations are made entirely of plasticine.  Unfortunately this term seems to have escaped me.  Due to mutiple skating sessions, holidays, special days in February (Valentine's day, 100 day, Chinese New Year, etc), illnesses and report cards, I only had the opportunty to read one book and show a few others before starting this activity.

Here are a few of Barbar Reid's books:

          BOOK: The New Baby Calf    BOOK: Tell Me a Story: Have You Seen Birds?: Book and…

           BOOK: Effie     BOOK: Two by Two

Here is how we did them:

1. Spread a thin layer of plasticine on your cardboard so that your pieces will easily stick to the board.

2. Take a small piece of flesh coloured plasticine and roll into a ball.  Then squishing between your palms, gently flatten like a pancake.  Use your fingers to carefully make the pancake thinner, retaining the round circular shape.


3. Lay the pancake on the prepared board and using a toothpick or skewer, trace the pancake gently into the background.

4. Remove the pancake.  Using the circle as a guide, roll and flatten down small orange balls of plasticine around the bottom of the circle, creating the beard. 


Ignore the green in this photo.  This was my practice one and I decided that adding the shoulders would be too difficult.

5. After the beard is finished, carefully lay the face down.  When you have it centered press it down a little to secure it.


6. Use green plasticine and create a "worm" that would create the brim of the hat.  Use more green to create a longer, skinnier worm to create the outline for the hat.  Use more green to fill in the rest of the hat.

7. Use small pieces of white, black and orange to create the rest of the facial features.

8. Use more black to create a ribbon for the hat.


HAPPY ST. PATRICKS' DAY!!!!!

LinkWithin

You May Also Like

Followers